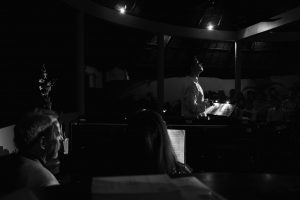
The Budda Tooth & Relic Temple in Singapore’s historic Chinatown can be difficult to shoot by virtue of the wide-angle distortion you’ll invariably encounter.
Like a lot of photographers, I’m drawn to capturing those “take-it-all-in,” ultra-wide cityscape shots… And I suspect I’m not the only photographer who has also spent WAY TOO MUCH MONEY on equipment and hence can’t afford a tilt-shift lens to keep the straight lines straight in my architectural shots. Here’s why I no longer need one: Adobe Lightroom’s ‘Guided Upright’ Tool.
While doing my usual perusal (read: procrastinating) on Facebook this morning, swigging back an enormous mug of coffee, I got a popup from Adobe Creative Cloud telling me that two of my apps needed an update. I updated, as I always do, around the same time noticing an article from Petapixel describing a new tool in Lightroom, the ‘Guided Upright’ Tool.
Now I was a little skeptical at first (ever the cynic, I know) about how much use the tool would be. After all, I’ve still not found much use for ‘Dehaze,’ and the recent announcement of ‘Content-Aware Crop’ is something I’ve been doing for years courtesy of a custom Photoshop action I’d created. After watching a video from Julieanne Kost, however, the tool’s potential became clear.
Rather than bleat on or attempt to create my own how-to guide, here’s Julieanne‘s excellent video on the new tool and its potential uses.
After watching the above video, my thoughts turned immediately to a photograph that I had always liked, but one in which the distortion troubled me: My shot taken from a balcony opposite the Buddha Tooth and Relic Temple in Singapore’s historic Chinatown.

You see here in the original shot that the buildings towards the edges of the image appear to be leaning out of the frame.
Now I’d attempted to correct the old version in both Lightroom and Photoshop before, and while I’m sure a little more reading on the topic would have eventually led me to being able to achieve similar results, I couldn’t help but be amazed at just how simple the new tool is. You have to know what you’re doing with it; really you need to be looking for lines that should be completely vertical or horizontal, not simply “straight” in order for the tool to be at its most effective, but the ability to mark up to 4 different lines throughout the image meant that Lightroom made light of a previously-tricky image rather easily.

Here you see me drawing in vertical and horizontal lines with the ‘Guided Upright’ tool to have Lightroom correct the scene for me.
To finish up, here’s a before and after demonstrating just what the tool is capable of; you’ll see that not only is the after looking much better with a view to building lean, but the temple is also much more distortion free, resulting in a much more natural-looking image. Hats off to you Adobe, the new tool is great!

A before and after showing what the ‘Guided Upright’ tool can do